
In this tutorial we’ll talk about expanding your canvas outside of where your PSD began. By using Canvas Size we can crop without deleting parts of our image (we can do this with the newer Crop tool too,) we can expand our image and add transparency or a color to any or all sides of our image, and we can even automatically trim away any leftover transparent bits of the image. You’re going to enjoy this tutorial!
1. Canvas Size vs. Image Size

You can open the Canvas Size dialog box by going Image>Canvas Size. Canvas Size is different than Image Size because Canvas size changes the boundaries of the Photoshop document, but not the pixels contained therein. If we change the canvas size to be smaller than the image when we opened it, we will clip(hide parts of) our image, but not resize our image like we would have in Image>Image Size. I am cutting the size of my canvas down to 4000px by 3000px. NOTE: You may get a warning from Photoshop letting you know that some clipping will happen. Don’t worry about that.
2. What Just Happened?

Once we reduce the size of our canvas, we can grab the Move tool (V) and drag our image around and we’ll see that in fact, the entire image is still there, but we can only see what overlays our new Photoshop canvas (which is what we changed!) TIP: Hit Cmd/Ctrl + T to bring up the free transform handles and see the outer edges of the image to see what is outside of our canvas.
3. Expand the Canvas to make a 1-Inch Border

I’m going to revert my image to the way it was when I first opened it and let’s open the Canvas Size dialog box again. I’m going to check on the “Relative” option and change the units of measure to inches in the little drop down menus and then add 2 inches to both the width and height. There is also a drop down menu near the bottom of the dialog box which will allows us change the color of the extended area. I set mine to white and hit “OK” to extend this image one inch on each side with a white border.
4. Trim and Reveal All
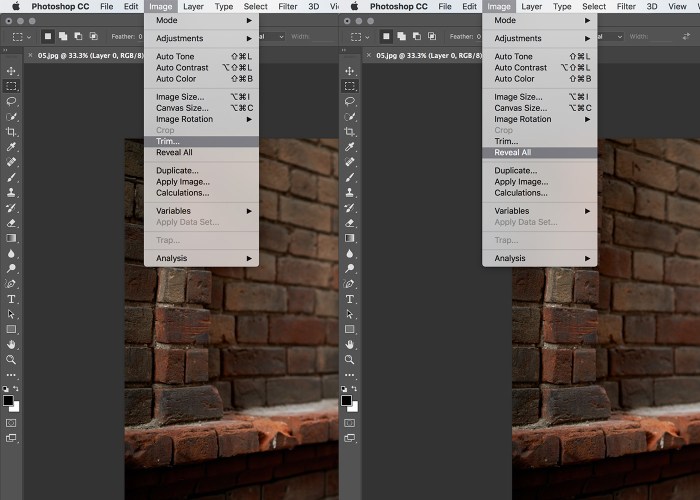
There are also options under the Image menu “Trim” and “Reveal All”. Trim allows you to quickly trim away transparent pixels from your image to get only used bits for your final image export. Reveal all will automatically expand the canvas of your PSD to show any graphics that are “sticking off” of the canvas area.
Be sure to watch the video at the top of this article tutorial for even more detail!
Sign up for my newsletter and stay up to date with all the tutvid.com happenings! Thanks for checking this tutorial out!
Leave a Reply