
They seem pretty basic and straight-forward, but there are some pretty cool things you can do with both audio and video transitions in Premiere Pro CC. There is a whole library of different transitions that you can use, there are some great hotkeys that allow you to add a transition to your clip so you can avoid dragging a transition effect out of the Effect Library and across your entire project, and much more!
Finding and Adding a Simple Transition

It all begins with finding and dragging out a simple transition. You can find the transitions in the “Audio Transitions” and “Video Transitions” folders in the Effects panel (Window>Effects). Select the Cross Dissolve transition and drop it on the edge of two video clips that touching each other. This will give you a nice fade between both of those clips.
Trimming and Editing the Transition

Once you’ve placed your transition, you can drag the crossfade back a forth a little bit to really refine how the fade takes place between your video clips. You can also hover your mouse over the very edge of the transition and drag the edge to make the transition longer or shorter (slower or faster.)
Adding Transitions Instantly with Hotkeys

With a clip that has no transitions, you can use the move tool (Black Arrow) and click on the transition itself and use the hotkey Shift + D to place your default transition on that audio and video track. You can also use the dedicated hotkeys, Cmd/Ctrl + D to add a transition to just the video track or Cmd/Ctrl + Shift + D to add a transition to just the audio track.
Setting a New Default Transition

If you don’t like the default transitions, you can simply right-click on any other transition and choose “Set Selected as Default Transition” and that will then be the audio or video transition that is placed when you use the Shift + D hotkey.
Changing the Default Transition Duration (Length)
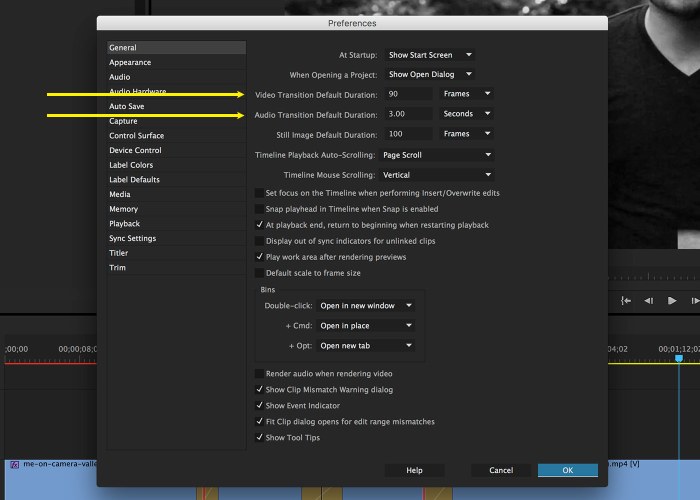
You can also change the default duration of a transition when it is placed by opening the Preferences panel (Cmd/Ctrl + ,) and simply change the default frames or seconds that make up the duration of either the audio or video transition.
I hope you checked out the video and loved it! Thanks!
Leave a Reply