
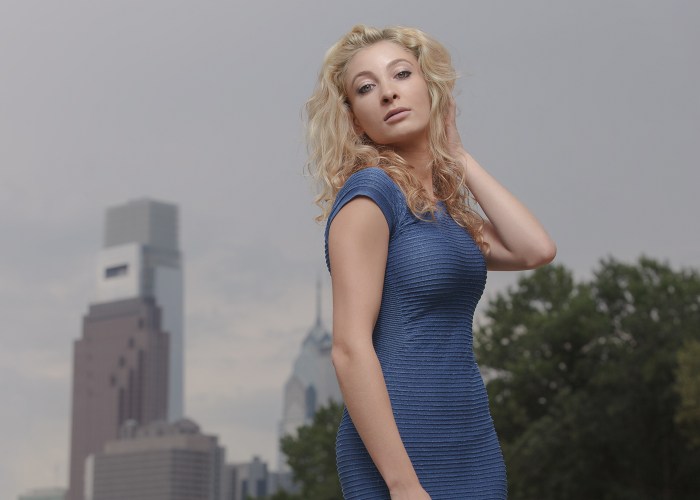
This tutorial is not about any specific technique, but instead about how I look at an image as I go through a retouching process and why I do one thing after another in the order I do when retouching images.
A little while ago I got a comment on one of my YouTube videos asking about the steps I take to retouch an image in Photoshop and I thought that it would make an interesting video, so here goes! I’m only covering a couple of the sexier bits of the process, but you can check out the video for the entire buffet of steps and really dive into my approach to retouching an environmental portrait.
Because this is more of an overview, I’m not getting into the details of each step, but I do have a tutorial for each of these steps and it is linked below:
See All 12 Parts!
[columns_row width=”half”]
[column]
Part 2: How to Liquify & Pushing Pixels
Part 3: How to Retouch the Skin
Part 4: How to Retouch Eyes, Lips, & Eyebrows
Part 6: Dodging and Burning the Photo
[/column]
[column]
Part 7: How to Get Moody Contrast & Tone
Part 8: How to Color Grade the Photo
Part 9: How to Sharpen the Photo
Part 10: The Benefits of Destructive Editing
Part 11: Create Lens Flare and Digital Lighting
Part 12: Tone Smoothing Grain and Finishing
[/column]
[/columns_row]
1. Camera RAW Processing

After the shoot, everything comes into my computer as RAW files and I typically would transfer to Lightroom for event shoots (wedding, live coverage, etc…) but for portraits like this I open in Camera RAW and look to create a preset that will apply to my entire batch of photos. My general approach it to reduce contrast and increase the dynamic range of the image and take advantage of that large, deeper bit depth of your RAW file. Check out the tutorial I have about this! [Coming soon!]
2. Pixel Pushing (Liquify, Transform, Lens Correction, etc…)

Moving on from Camera RAW I import a Smart Object to Photoshop and the very first thing I look to do is any kind of pixel altering things that might need to be done. The beautiful thing is that most of these things can be done via smart filters (Liquify, Lens Correction, etc…) Check out the tutorial to see exactly what I do, how I do it, and why I do it. [Coming soon!]
3. Blemish Removal (Non-destructive!)

I like to work as non-destructively as possible so I like to heal blemishes on a new layer, in fact, I like to use a process called frequency separation which is the creme de la creme in terms of skin retouching and correcting/healing blemishes in general. Learn all about frequency separation and download my action to get you started with it in this tutorial on my site here! [Coming soon!]
4. Facial Details (Eyes, Lips, Eyebrows)

After cleaning up the skin, the next step is to retouch the eyes, but take care not to over-retouch them! I’ll also take some time to clear away veins that you can see on the eyes, clear any blemishes you see on the lips, and also trim the eyebrows. Check out exactly how I do it and grab the free action I have for retouching eyes over at my tutorial! [Coming soon!]
5. Retouching the Hair

After skin and facial feature work, it’s time to look at retouching the hair. The technique that I use riffs on the frequency separation we used to heal the skin and allows me to heal and fill areas where I can see through her hair and also correct any lines or imperfections in her hair. This technique allows you to get either an extreme beauty smoothed hair, or just for moderate changes and healing projects with regard to the hair. Check out the full tutorial on my site and grab the free action download I have for healing and retouching hair too! [Coming soon!]
6. Dodging and Burning
To bring out details and begin pouring contrast back into our image where we want, we will begin the process of dodging and burning in a most non-destructive way. Check out the tutorial and grab my free action there too which will get you setup with the dodge and burn layers instantly. [Coming soon!]
7. Contrast and Tonal Adjustments

Once the healing and cleaning up of the image is finished, we are moving into the toning process and setting the brightness/contrast level of our image using Adjustment Layers to give us the ultimate control. Check out the tutorial and see exactly how I blend Adjustment Layers, masks, and blending modes to get a sweet image. I also have a free action you can download over with my tutorial too. [Coming soon!]
8. Color Grading

Getting the color right in your image is really important and once I have the retouching finished and the tones worked out, it’s time to work out the color and mood of our image. I’ll show you how I do this with Curves, Color Balance, and Gradient Maps. Check out the full tutorial and grab a pack of gradients I’ve made just for gradient maps and color grading by clicking this link! [Coming soon!]
9. Sharpening

Every digital image needs to be sharpened and I have a couple of different ways I use, but for this image I used a method that allows me to use Smart Sharpen and selectively sharpen different areas of my image depending on the sharpness and texture in that area of the image. Check out my tutorial all about this and how I did it with this image right here! [Coming soon!]
10. Catch All Layer

It’s important to take a close look at every bit of our image at 100% and find any blemishes. I’ll show you how I use the Healing Brush tool to make any last moment retouches before the final lighting and grain steps. Check out the tutorial about this right here. [Coming soon!]
11. Digital Re-Lighting/Lens Flares

Occasionally it can be fun to adjust the lighting of your image and I will usually do this with either a VERY soft edged mask and a pair of Levels Adjustment layers, or, as I will do in the tutorial about this, I will create a large lens flare which will create both a semi-directional light source, but also tends to create a color haze that can affect or enhance (or de-hance in some situations if not used well) the image. See all about how I do this in the full tutorial and also download my free action for creating a new lens flare in seconds. (One that actually looks good!) [Coming soon!]
12. Tone Smoothing Grain

Last, but not least, I like to add a couple layers of realistic grain over my entire image to blend all the tones and colors together and cut down on digital banding. This is NOT a hipster, film grain, Instagram style effect, this is a subtle noise that will help blend all the healing and adjustments you’ve done all together. Check out my tutorial on how I do this and also grab the free action so you can create realistic grain with the click of a button! [Coming soon!]
Leave a Reply