
Download RAW Files For This Tutorial »
Retouch a Classic Black and White Child Photo

I say it all the time and I’ll say it again here, you really want to start with a decent photo to get a good finished result. The better your image is before retouching, the better the image will be after retouching. You should be able to follow this tutorial with either a RAW image or a JPEG and almost any image style will work.
Open Image in Photoshop

You can use the exact image that I’m using in this tutorial by downloading it here. If you have your own JPEG photo go ahead and open it in Photoshop. If you have a RAW file, we’re going to open that with Photoshop as well and just go ahead and click the “Open Image” button to open the photo in Photoshop.
Blemishes Must Go

Once we have our image in Photoshop we’ll first look around the photo and clean up blemishes. Create a new layer by going Layer>New>Layer and name this layer “Blemishes”.
Healing Brush

Grab the Healing Brush tool and right click anywhere on the photo and set the size to something that’s not too-big, but not tiny either. I like to reduce my hardness to 0%.
Current and Below

Look to the toolbar that runs across the top of the screen and set the Sample drop down menu to “Current and Below”. This will allow us to sample color and texture off the layer below, but paint and heal on this top layer. This means that if we really mess things up we can just delete this layer and we haven’t made permanent changes to our image.
Clear Blemishes

Now we’ll zoom in on the image and look for any blemishes on skin, the backdrop, or spots that may show up on the image from little bits of dirt on the camera sensor. I’ve found this spot on the floor. Hold your Alt/Opt key to sample a clean area around the blemish and then simply paint over the blemish to make it disappear.
Spend Time Cleaning Blemishes

I’m going to go over this image a little more thoroughly. You can check out the video for a more detailed explanation and to see exactly what and where I’m healing.
Channel Mixer – Monochrome

To begin the black and white conversion go Layer>New Adjustment Layer>Channel Mixer and check on the “Monochrome” option and increase the Constant to about “+5”. This is the first layer of black and white adjustment. It gets better!
Black and White Gradient
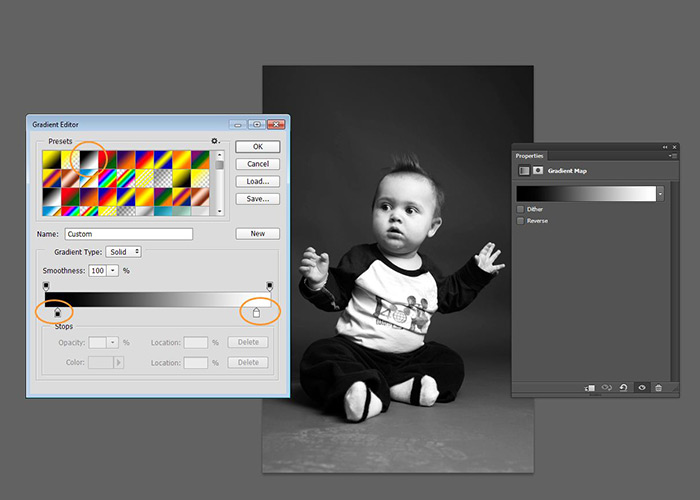
Next we go Layer>New Adjustment Layer>Gradient Map and click on the gradient stripe to edit the gradient. Choose the black to white color thumbnail. Drag the black color anchor inward from the left and the white color anchor in from the right just as I have in my screenshot.
Pump The Contrast

Now go Layer>New Adjustment Layer>Curves and select the “Linear Contrast (RGB)” from the Presets drop down menu. This will add an additional pop of contrast to our image.
Adding Grain

Lastly, we’ll add some beautiful grain to really set off the finished “classic” look. Add a new layer by going Layer>New>Layer and name this layer “Grain”.
Fill Layer With 50% Gray

Next, go Edit>Fill and choose “50% Gray” from the Contents drop down menu. Once we’ve got a layer filled with perfect, 50% gray, we want to go Filter>Noise>Add Noise. Add 15% of noise. Hit “OK”.
Soft Light Blend Mode

I’m going to grab the Zoom tool (Z) and zoom in quite a bit and then set this “Grain” layer to the Blend mode of “Soft Light”. This will dump the gray and save the grain. Awesome. We’re done! Save your image and share with all of your friends.
Leave a Reply